Wednesday, February 5, 2025
Step-by-Step Pallet Furniture Plans for Upcycled Creations
Step-by-Step Pallet Furniture Plans for Your Upcycled Masterpieces
Hey there, fellow upcycling enthusiasts! Are you itching to transform those discarded pallets into stunning pieces of furniture? You've come to the right place! This guide is your ticket to creating gorgeous, rustic furniture from reclaimed wood, saving money, and being kind to the planet. We'll walk through everything from sourcing your pallets to adding those final finishing touches. Get ready to unleash your inner craftsman!

Finding Your Perfect Pallets
Before you get your hammer swinging, you need to source your pallets. This is the fun part (and arguably the most important)! Here's what you need to keep in mind:

Where to Find Pallets:
- Local Businesses: Supermarkets, construction sites, and even breweries often have pallets they're happy to give away. Just ask nicely!
- Online Classifieds: Check Craigslist, Facebook Marketplace, or your local online community groups. You might find someone giving away pallets for free or selling them for a steal.
- Pallet Suppliers: While not always free, some companies specialize in selling used pallets, offering a variety of sizes and conditions.
Important Note: When collecting pallets, always prioritize heat-treated pallets (marked with HT or ISPM15). These are safe for indoor use and won't have harmful pesticides.
Essential Tools and Materials
Let's gather our supplies! You don't need a fancy workshop to build pallet furniture; just a few essential tools will do the trick.
Tools:
- Hammer: A trusty claw hammer is your best friend.
- Pry Bar/Crowbar: Useful for separating pallet boards.
- Screwdriver (Phillips and Flathead): For attaching pieces.
- Safety Glasses: Protect your eyes from flying wood splinters!
- Measuring Tape: Essential for accurate cuts.
- Saw (Hand Saw or Circular Saw): For cutting wood to size (a circular saw makes things much faster, but a hand saw works fine).
- Drill (Optional but Recommended): Makes attaching pieces much easier and more secure.
- Sandpaper (Various grits): To smooth out rough edges and surfaces.
- Work Gloves: Protect your hands!
Materials:
- Wood Screws: Choose exterior-grade screws for durability.
- Wood Glue: Enhances the strength of your joints.
- Wood Stain or Paint: To protect and personalize your creation.
- Polyurethane or other sealant: To protect the wood from moisture and wear.
Simple Pallet Coffee Table Project
Let's build a coffee table! This project is perfect for beginners and requires minimal tools.
Step 1: Pallet Preparation
Carefully dismantle your chosen pallets. Use a pry bar to separate the boards. Inspect each board for damage; discard any that are cracked or severely warped. You'll need enough boards to create the desired tabletop and base.
Step 2: Creating the Tabletop
Arrange the boards side-by-side to create your tabletop, leaving slight gaps for a rustic look or aligning them tightly for a cleaner finish. Secure the boards together using wood glue and screws, predrilling pilot holes to prevent the wood from splitting.
Step 3: Constructing the Base
For the base, you can use two or three smaller pallet sections arranged to form a sturdy frame. Securely fasten them together with screws and wood glue. Remember to measure and cut the pallet sections if needed to fit your tabletop.
Step 4: Attaching the Tabletop to the Base
Carefully position the tabletop on top of the base and attach it using screws, ensuring that the tabletop sits securely and evenly. Consider using corner brackets for extra stability.
Step 5: Sanding and Finishing
Once everything is assembled, sand the entire coffee table to smooth out any rough edges and splinters. Then, apply your chosen wood stain, paint, or sealant, following the manufacturer's instructions. Let it dry completely before using your new coffee table!
More Advanced Pallet Projects
Once you've mastered the coffee table, you can move on to more ambitious projects!
Pallet Headboard
A stunning headboard can be created by attaching several cleaned and sanded pallet boards vertically. Add some decorative elements, paint, or stain to match your bedroom décor. Remember to reinforce the structure for added sturdiness.
Pallet Shelving Unit
Create a rustic shelving unit by stacking and securing cleaned and sanded pallet sections vertically or horizontally. This is a great project to experiment with different staining techniques and add personal touches. Consider adding some metal brackets for extra stability.
Pallet Garden Bed
Pallet wood is excellent for creating raised garden beds. You can construct a box-like structure by attaching pallet sections, ensuring there is sufficient space for drainage. Consider lining the interior with landscape fabric to prevent soil from escaping.
Safety First!
Remember, safety should always be your top priority when working with wood and tools. Always wear safety glasses, gloves, and appropriate clothing. Take your time, work in a well-ventilated area, and don't hesitate to ask for help if you're unsure about anything.
Commonly Asked Questions
Here are some common questions I get about building pallet furniture:
- Q: Are all pallets safe to use indoors? A: No, only heat-treated pallets (marked HT or ISPM15) are suitable for indoor use. Others may contain harmful chemicals.
- Q: How do I remove stubborn nails from pallets? A: Use a claw hammer and pry bar to carefully remove them. Be patient and work slowly to avoid injury.
- Q: What kind of wood are pallets made of? A: Pallets are usually made from softwoods like pine or fir. The quality can vary.
- Q: Can I use exterior-grade paint or stain on my pallet furniture? A: Yes, exterior-grade finishes are best as they provide better protection against moisture and wear.
- Q: How do I clean the pallets before I start building? A: Use a stiff brush to remove any dirt, debris, or loose wood pieces. Consider a power washer for a deeper clean (remember to let them dry thoroughly).
Happy building! Let your creativity run wild, and don't forget to share your amazing pallet creations with me! I'd love to see what you come up with.

DIY Outside Furniture Plans for Custom Handmade Pieces
Craft Your Dream Outdoor Oasis: DIY Furniture Plans for Unique Handmade Pieces
Tired of generic outdoor furniture? Yearning for a space that truly reflects your style and personality? Then unleash your inner craftsman and build your own! This guide provides detailed plans and inspiration for creating unique, handmade outdoor furniture pieces that will transform your patio, deck, or garden into a breathtaking retreat. Forget mass-produced uniformity; embrace the beauty and satisfaction of crafting something truly special with your own two hands.

Choosing Your Project: From Simple to Spectacular
The world of DIY outdoor furniture is vast and varied, offering projects for all skill levels. Begin by assessing your woodworking abilities and the time you're willing to commit. A simple project like a pallet coffee table can be a fantastic entry point, while more ambitious endeavors, like a handcrafted Adirondack chair or a stunning outdoor sofa, demand more experience and dedication. Carefully consider your available tools and materials as well; some projects require specialized equipment and specific types of wood.

Beginner-Friendly Projects:
- Pallet Furniture: Repurpose old pallets into charming coffee tables, benches, or even vertical gardens. Sand them down, add a coat of weather-resistant paint or stain, and watch them transform!
- Simple Picnic Table: A classic design, this project is perfect for honing your basic woodworking skills. Use readily available lumber and follow straightforward instructions for a functional and attractive piece.
- Upcycled Planter Boxes: Give old barrels, crates, or even repurposed buckets a new life by turning them into unique and charming planter boxes. Adding casters makes them easily movable.
Intermediate to Advanced Projects:
- Adirondack Chairs: These iconic chairs require more precision and attention to detail, but the result is a beautiful and comfortable addition to any outdoor space. Numerous plans are available online, catering to different skill levels.
- Outdoor Sofa/Lounge Set: This ambitious project demands significant woodworking experience, but the reward is a truly bespoke seating area tailored to your exact preferences and dimensions. Consider using weather-resistant materials like cedar or teak.
- Custom-Designed Pergola: For the truly adventurous DIYer, building a pergola is a rewarding challenge that will dramatically enhance your outdoor area, providing shade and architectural interest.
Gathering Your Materials and Tools
Before you begin, meticulously plan your project. Create detailed blueprints, taking precise measurements and accounting for all necessary materials. Source high-quality lumber that's specifically treated for outdoor use to ensure durability and longevity. Don't skimp on the finishing touches; a quality stain or sealant is crucial for protecting your furniture from the elements. Gather all your tools beforehand – a well-stocked toolbox is essential for a successful outcome. This includes measuring tools, saws (circular saw, hand saw), drills, sanders, clamps, and appropriate safety gear like eye protection and gloves.
Building Your Masterpiece: Step-by-Step Guide (Example: Simple Bench)
Let's illustrate the process with a simple bench. First, cut your lumber to the required lengths based on your blueprint. Then, using wood glue and screws, assemble the legs and supports. Ensure everything is square and level using a carpenter's square and level. Next, attach the seat boards, ensuring even spacing and secure fastenings. Finally, sand down any rough edges and apply your chosen stain or sealant, following the manufacturer's instructions. Allow ample drying time before enjoying your handcrafted bench.
Finishing Touches and Personalization
Once your furniture is built and finished, don't hesitate to add your personal touch! Consider adding decorative elements like cushions, throws, or planters. Get creative with paint colors, stencils, or even mosaic tiles. The possibilities are endless! Remember, the goal is to create a space that reflects your unique style and brings you joy. Enjoy the process, celebrate your accomplishments, and most importantly, relax and savor your handmade outdoor oasis.
Sunday, February 2, 2025
Chest Woodworking Plans for Storage and Organization
Chest Woodworking Plans for Storage and Organization
The construction of a handcrafted wooden chest offers a rewarding woodworking project with tangible results. Beyond the inherent satisfaction of creating something beautiful and functional, a chest provides invaluable storage and organization solutions for a variety of applications. This comprehensive guide delves into the design considerations, material selection, construction techniques, and finishing processes involved in building your own bespoke wooden chest.

I. Design Considerations: Form and Function
Before embarking on the construction phase, careful planning is crucial. The design should reflect both aesthetic preferences and practical needs. Several key factors must be considered:

A. Size and Dimensions
The intended use dictates the necessary size. A small chest might suffice for jewelry or personal mementos, while a larger chest could serve as luggage or a blanket chest. Accurate measurements are paramount. Consider the space available where the chest will be placed and ensure the dimensions are appropriate for both the location and its intended purpose. Detailed sketches and diagrams are invaluable at this stage, allowing for visualization and adjustment before material commitment.
B. Style and Aesthetics
A wide range of aesthetic choices exists. A simple, minimalist design might appeal to some, while others may prefer intricate carvings or decorative elements. Consider the overall style of the room or area where the chest will reside. The choice of wood species significantly influences the final aesthetic. Light-colored woods like pine or maple create a bright and airy feel, while darker woods such as walnut or cherry project a sense of richness and sophistication. The style should be harmonious with existing décor.
C. Construction Method
The choice of construction method significantly impacts the chest's strength and durability. Several methods are viable, each with its own set of advantages and disadvantages:
- Dovetail Joints: These intricate joints offer exceptional strength and are highly aesthetically pleasing, but require advanced woodworking skills.
- Rabbet Joints: Simpler to construct than dovetails, rabbet joints provide adequate strength for most applications. They are a good choice for beginners.
- Dado Joints: These joints offer good strength and are relatively easy to construct, particularly with the aid of a table saw.
- Butt Joints: The simplest joint, butt joints require reinforcement with screws or dowels for adequate strength.
The selected joint type should align with the woodworker's skill level and the desired level of structural integrity.
D. Hardware Selection
The choice of hinges, latches, and handles greatly influences the chest's functionality and appearance. High-quality hardware enhances both durability and aesthetics. Consider the style and finish of the hardware to ensure it complements the overall design. The weight and size of the chest will dictate the type and strength of hinges required. A variety of latches are available, ranging from simple catches to intricate locking mechanisms.
II. Material Selection and Preparation
The selection of appropriate wood significantly impacts the chest's longevity and aesthetic appeal. Several factors influence material selection:
A. Wood Species
The choice of wood species depends on budget, desired aesthetic, and required strength. Hardwoods, such as oak, cherry, maple, and walnut, offer superior durability and strength but are generally more expensive. Softwoods, like pine and fir, are more affordable but less durable. Consider the wood's grain pattern, color, and workability when making a selection. The wood's density also impacts the tools and techniques required for construction.
B. Wood Preparation
Before construction, the wood must be properly prepared. This involves milling the lumber to the required dimensions, ensuring it is square and free of defects. Planing and sanding are essential to achieve a smooth surface for assembly and finishing. Properly seasoned wood is crucial to minimize warping and cracking during and after construction. Allow sufficient drying time for newly purchased wood before starting the project.
III. Construction Techniques
Detailed step-by-step instructions are essential for successful chest construction. This section provides a general overview; specific instructions will vary depending on the chosen design and construction methods.
A. Building the Case
The construction of the chest's case involves joining the sides, top, bottom, and front/back panels. The chosen joinery method (dovetail, rabbet, dado, or butt joints) will dictate the specific steps involved. Precise cuts are critical for a strong and aesthetically pleasing result. Clamping is vital throughout the assembly process to ensure tight joints and square construction.
B. Adding Internal Structure
Depending on the design, internal dividers or shelves might be incorporated. These components add functionality and enhance organization. Construction methods for internal components are similar to the case construction, utilizing appropriate joinery techniques to ensure stability. The positioning of dividers should be carefully planned to optimize storage space.
C. Attaching the Lid
The lid construction can be a simple flat panel or a more complex design incorporating molding or carvings. Hinges are carefully attached to both the lid and the chest's top edge. Precise placement of hinges ensures smooth and even lid operation. The weight of the lid should be considered when selecting hinges to ensure adequate support.
D. Installing Hardware
Once the case and lid are complete, the hardware—hinges, latches, and handles—is installed. Pre-drilling pilot holes is essential to prevent wood splitting. Accurate placement of hardware enhances both functionality and aesthetics. Testing the operation of the lid and latches ensures proper functionality before proceeding to finishing.
IV. Finishing the Chest
Finishing enhances both the aesthetics and durability of the chest. This involves sanding, applying stain or paint, and applying a protective topcoat.
A. Sanding
Thorough sanding is essential to create a smooth surface for the finish. Begin with coarser grits to remove imperfections and gradually progress to finer grits to achieve a smooth, even surface. Sanding along the wood grain is important to avoid creating scratches. Pay close attention to corners and edges.
B. Applying Stain or Paint
The choice between stain and paint depends on aesthetic preferences. Stain enhances the wood grain, while paint provides a solid color. Apply stain or paint according to manufacturer's instructions. Multiple thin coats are preferable to one thick coat to achieve even coverage. Allow adequate drying time between coats.
C. Applying Topcoat
A topcoat protects the finish from scratches, wear, and moisture. Various topcoats are available, including polyurethane, varnish, and lacquer. Select a topcoat appropriate for the intended use and environment. Apply multiple thin coats, allowing adequate drying time between coats. A final sanding with very fine grit sandpaper may be necessary between coats to achieve a perfectly smooth finish.
Building a wooden chest is a rewarding project. Careful planning, meticulous construction, and attention to detail result in a beautiful and functional piece that enhances any home. Remember to always prioritize safety when using woodworking tools and to follow all safety guidelines.
Build a Safe and Beautiful Cradle for Your Baby with These Woodworking Plans
Build a Safe and Beautiful Cradle for Your Baby: A Woodworker's Guide
Hey there, fellow woodworkers and soon-to-be parents! So, you're expecting a little one and you're thinking about building a cradle? That's awesome! There's something incredibly special about crafting something with your own two hands that will hold your precious baby. This isn't just about building a crib; it's about creating a loving, safe space for your little bundle of joy. This guide will walk you through the process of building a beautiful and, most importantly, *safe* cradle. Let's get started!

Choosing Your Wood and Materials
The first step, and arguably the most important, is selecting the right wood. Safety is paramount here. You'll want to choose a wood that's:
- Strong and durable: Hardwoods like maple, cherry, or oak are excellent choices. They're less prone to scratches and dents and can withstand the rigors of daily use. Avoid softwoods like pine, as they can be easily damaged.
- Non-toxic: Make sure your wood is treated with non-toxic finishes. Avoid anything containing lead or other harmful chemicals. Water-based polyurethane or natural oils are great options. Always check the manufacturer's safety data sheets (SDS) before using any finish.
- Smooth and splinter-free: This is crucial for your baby's safety. Sand all surfaces meticulously, paying close attention to corners and edges. Use progressively finer grits of sandpaper to achieve a perfectly smooth finish.
Beyond the wood, you'll also need:
- Wood glue: A high-quality, waterproof wood glue is essential for strong joints.
- Screws: Use screws that are long enough to provide secure fastening but not so long that they poke through the other side. Wood screws designed for furniture are ideal.
- Sandpaper: A variety of grits, from coarse to fine, will be needed for smoothing the wood.
- Wood finish: Choose a non-toxic, child-safe finish. Again, water-based polyurethane or natural oils are great options.
- Measuring tape, pencil, and square: Accurate measurements are crucial for a well-built cradle.
- Clamps: To hold pieces together while the glue dries.
- Safety glasses and dust mask: Always prioritize safety when working with wood.
- Mattress: A firm, appropriately sized mattress specifically designed for a cradle is absolutely necessary. Never use a soft mattress or bedding.
Building the Cradle Frame

Cutting the Wood
Begin by cutting your wood according to your chosen plan. Accurate measurements are key here. Use a miter saw or hand saw, ensuring clean, precise cuts. Double-check your measurements before making any cuts – you can't easily undo a mistake!
Assembling the Sides and Base
Once you have all your pieces cut, you can begin assembling the frame. Start by joining the side pieces to the base using wood glue and screws. Make sure your joints are square and tight. Use clamps to hold everything in place while the glue dries. This is where having a helper can be incredibly useful!
Adding the Headboard and Footboard
Next, attach the headboard and footboard to the sides and base. Again, use wood glue and screws for strong, durable joints. Make sure everything is aligned perfectly and securely fastened before moving on.
Adding the Slats and Finishing Touches
Installing the Cradle Slats
The slats are crucial for supporting the mattress and ensuring proper ventilation. Space them evenly, following your chosen plan's specifications. Make sure the slats are securely attached to the frame – you want them to be firmly in place but also easy to clean.
Sanding and Finishing
Once the cradle is fully assembled, it's time for sanding. This is arguably the most important safety step. Sand all surfaces thoroughly, starting with coarser grits and working your way up to finer grits. Pay close attention to all edges and corners, ensuring a perfectly smooth finish. This will prevent splinters and make the cradle safer for your baby. After sanding, apply your chosen non-toxic finish. Follow the manufacturer's instructions carefully. Allow ample drying time between coats.
Safety Considerations: A Must-Read
Safety is paramount! Remember that this cradle will be housing your precious baby. Here are some crucial safety checks to perform throughout and after construction:
- Distance between slats: Ensure the distance between the slats meets the required safety standards. The gaps should be small enough to prevent your baby's head or limbs from getting trapped.
- Sharp edges and corners: Sand all edges and corners meticulously. Use appropriate safety measures while sanding to avoid inhaling wood dust.
- Stability: Test the cradle's stability thoroughly. Make sure it's sturdy and won't easily tip over.
- Hardware: Ensure all screws are flush or countersunk and covered with wood filler to avoid any sharp points that could injure your child.
- Finish: Use only non-toxic finishes. Always allow ample drying time before your baby uses the cradle.
- Mattress fit: The mattress should fit snugly, with no gaps between the mattress and the sides of the cradle.
- Never leave your baby unattended in the cradle: Always supervise your baby while they are in the cradle.
Commonly Asked Questions
Q: What kind of wood is best for a baby cradle?
A: Hardwoods like maple, cherry, or oak are excellent choices due to their strength and durability. Avoid softwoods which are more prone to damage.
Q: What kind of finish should I use?
A: Use a non-toxic, child-safe finish such as water-based polyurethane or natural oils. Always check the manufacturer's safety data sheet (SDS) before using any finish.
Q: How do I ensure the cradle is stable?
A: Use strong, durable wood, secure joints, and reinforce the frame as needed. Test the stability thoroughly before your baby uses the cradle.
Q: How often should I check the cradle for safety?
A: Regularly inspect the cradle for any signs of damage, loose screws, or wear and tear. Replace or repair any damaged parts immediately.
Q: Can I use a standard crib mattress?
A: No, you need a mattress specifically designed for a cradle. It should fit snugly within the dimensions of your handcrafted cradle.
Building a cradle is a rewarding project, but remember that safety should always be your top priority. By following these guidelines and using high-quality materials, you can create a beautiful and safe haven for your little one. Happy building!
Saturday, February 1, 2025
Cool Woodworking Projects for Unique and Creative Builds
Beyond the Birdhouse: Cool Woodworking Projects for Unique and Creative Builds
Hey there, fellow woodworkers! So you're itching to build something amazing, something that'll really show off your skills and leave everyone saying "Wow, you made *that*?!" Forget the same old birdhouses and simple shelves (unless that's your jam, of course!). Let's dive into some seriously cool woodworking projects that'll push your creativity and leave you feeling incredibly accomplished.
Whimsical & Functional: Projects with a Touch of Magic
Let's start with projects that blend practicality with a dash of the extraordinary. These aren't just pieces of furniture; they're statements!

A Secret Compartment Bookcase
This is a classic for a reason! Imagine a seemingly ordinary bookcase, but with a hidden compartment cleverly concealed behind a cleverly disguised bookshelf. You could hide valuables, secret letters, or even a stash of your favorite cookies! The key is in the design – making the secret compartment door look seamlessly integrated into the rest of the bookcase. Think about using hidden hinges and clever joinery techniques. You can even add a small, almost invisible lock for extra security.
A Custom-Shaped Wooden Clock
Forget those boring round clocks! Get creative with the shape. A geometric clock with sharp angles? A whimsical, organic shape resembling a leaf or an animal? The possibilities are endless! You can experiment with different types of wood, contrasting stains, and even incorporate some inlay work to add extra detail. The challenge here is in precision cutting and ensuring the clock mechanism fits perfectly.
A Live-Edge Coffee Table with Epoxy Resin River
This project is stunning and relatively straightforward. Find a beautiful piece of live-edge wood (a slab with the natural bark edge intact). Then, pour epoxy resin into a groove cut into the wood, creating a flowing "river" of color and depth. This adds a modern, artistic element that will transform any living room. Be sure to research epoxy resin techniques thoroughly – it requires careful preparation and measuring.
Challenging & Rewarding: Projects for the Experienced Woodworker
Ready to take on something really ambitious? These projects will test your skills and reward you with truly unique pieces.
A Fully Functional Wooden Mechanical Clock
This is not for the faint of heart! Building a fully functional wooden clock from scratch involves intricate design, precise cutting, and a deep understanding of gear mechanisms. You'll be learning about horology, a fascinating field in itself. However, the satisfaction of building and seeing a clock you created tick away the seconds is unparalleled.
A Custom-Built Wooden Boat
This is the ultimate woodworking challenge! Building a small wooden boat, whether a kayak, canoe, or even a small sailboat, requires advanced skills in woodworking, boat building techniques, and potentially even fiberglass work. This project will take time and dedication, but the end result is a truly impressive achievement.
A Reclaimed Wood Wall Art Sculpture
Gather interesting pieces of reclaimed wood – driftwood, old fence posts, pallet wood – and create a unique wall art piece. It could be a simple geometric design, an abstract sculpture, or even a representation of something meaningful to you. The challenge lies in combining different textures, shapes, and sizes of wood to create a harmonious and visually appealing piece.
Creative & Fun: Projects for Everyone
These projects are great for those who are just starting out or looking for something fun and quick to make.
Personalized Wooden Coasters
These are a simple yet effective project. You can use various techniques like engraving, burning, or painting to personalize each coaster. They make great gifts or additions to your home.
Wooden Toy Vehicles
Build a classic wooden toy car, truck, or train for a child (or even for yourself!). These can be simple designs or more complex creations, depending on your skill level. Kids (and adults!) love playing with hand-made wooden toys!
Magnetic Wooden Bookmarks
Craft unique and beautiful bookmarks that are both practical and decorative. You can incorporate different shapes, wood types, and even add some small magnets to keep them firmly attached to your pages. This is a great project for practicing fine woodworking skills.
Tips for Success
No matter which project you choose, here are a few tips to help ensure your success:
- Plan Carefully: Before you even pick up a saw, meticulously plan your project. Draw detailed sketches, create a cut list, and visualize the entire process.
- Choose the Right Wood: Select wood appropriate for your project. Consider hardness, grain, and overall aesthetic.
- Invest in Good Tools: You don't need a full workshop, but having quality tools (a good saw, chisels, clamps) will make a big difference.
- Take Your Time: Rushing can lead to mistakes. Be patient, take breaks, and enjoy the process.
- Embrace Imperfection: Handmade items have character! Don't strive for robotic perfection – a little imperfection adds charm.
Commonly Asked Questions
Q: What's the best type of wood for beginners?
A: Pine and basswood are both softwoods, easy to work with, and relatively inexpensive. They're excellent choices for starting out.
Q: What tools do I absolutely need?
A: At a minimum, you'll need a good saw (hand saw or circular saw), a measuring tape, sandpaper, and wood glue.
Q: Where can I find woodworking plans?
A: There are countless resources online, including websites like Instructables, Pinterest, and various woodworking blogs. Many books and magazines offer woodworking plans as well.
Q: How do I finish my project?
A: There are many finishes you can choose from, including stains, varnishes, paints, and oils. Research the different finishes and choose one that complements your project and provides the desired level of protection.
So there you have it! A whirlwind tour of cool woodworking projects. Now go forth and create something amazing!
Wednesday, January 22, 2025
Customizable contemporary woodworking designs for unique decor

Unleashing Your Inner Artisan: Customizable Contemporary Woodworking for Unique Decor
Tired of mass-produced furniture that lacks personality? Yearning for pieces that reflect your unique style and tell a story? Then step into the exciting world of customizable contemporary woodworking. This isn't your grandfather's woodworking; we're talking sleek lines, innovative designs, and personalized touches that transform your living space into a true reflection of you. Forget cookie-cutter aesthetics â€" let's craft something extraordinary.
The Allure of Customizable Woodworking
Custom woodworking offers an unparalleled level of personalization. You dictate the dimensions, the wood type â€" from the rustic warmth of reclaimed barn wood to the elegant grain of walnut â€" the finish, and even the intricate details. Imagine a coffee table sculpted to perfectly fit your living room's alcove, or a bookshelf meticulously designed to showcase your prized collection. This level of bespoke craftsmanship results in furniture that's not only beautiful but also incredibly functional and perfectly suited to your needs. The process itself becomes a collaborative journey, allowing you to work closely with skilled artisans to bring your vision to life.
Exploring Contemporary Design Styles
Minimalist Elegance
Contemporary woodworking excels in minimalist designs. Clean lines, simple forms, and a focus on the natural beauty of the wood create a sense of calm and sophistication. Think sleek floating shelves with subtly integrated LED lighting, or a low-profile media console with hidden storage, showcasing the inherent elegance of the wood grain.
Mid-Century Modern Revival
Reimagine the iconic forms of mid-century modern design with a contemporary twist. Custom pieces can capture the spirit of this era while incorporating modern materials and techniques. Consider a tapered leg dining table with a live-edge tabletop, or a credenza featuring meticulously crafted geometric details. This style blends vintage charm with modern functionality.
Industrial Chic Fusion
Embrace the raw, industrial aesthetic by combining the warmth of wood with metal accents. Imagine a coffee table featuring a reclaimed wood top supported by sleek, black metal legs, or a bookshelf with exposed metal brackets showcasing the wood's natural texture. This juxtaposition of materials creates a visually striking and unique piece.
Choosing Your Wood and Finish
The selection of wood and finish dramatically impacts the final aesthetic. Hardwoods like walnut, cherry, and oak offer exceptional durability and rich tones. Softwoods like pine and fir provide a more rustic, casual feel. Consider the color, grain, and texture when making your selection. The finish â€" from a natural oil finish emphasizing the wood's grain to a high-gloss lacquer â€" further enhances the piece's character. The possibilities are truly endless.
The Benefits of Commissioning Custom Pieces
Beyond the aesthetic appeal, commissioning custom woodworking offers several key advantages:
- Unparalleled personalization: Design a piece that perfectly meets your specific needs and style.
- Superior quality: Work with skilled artisans using high-quality materials and techniques.
- Increased value: Custom-made furniture often appreciates in value over time.
- Sustainability: Choose eco-friendly wood sources and support local artisans.
Investing in customizable contemporary woodworking is an investment in your home and your unique style. It's about creating pieces that are not just functional, but also tell your story, reflect your personality, and stand as testament to your appreciation for quality craftsmanship. Embrace the opportunity to transform your living space into a sanctuary of personalized design.
How to build a sturdy chaise lounge for your outdoor space

Crafting a Durable Outdoor Chaise Lounge: A Step-by-Step Guide
Escape to your own private oasis with a sturdy, handcrafted chaise lounge built to withstand the elements. This detailed guide walks you through the process of creating a comfortable and long-lasting piece of outdoor furniture. Prepare to enjoy lazy summer afternoons in ultimate relaxation!
Planning Your Chaise Lounge
Before diving into construction, carefully plan your chaise lounge's dimensions and design. Consider your desired length, width, and height. Sketch your design, noting the angles and curves. Choosing the right wood is crucial for outdoor durability. Ipe, cedar, and redwood are excellent choices due to their natural resistance to rot and insects. Calculate the required lumber quantity based on your design and purchase slightly more to account for potential errors or waste. Consider the style; a classic, sleek design might utilize clean lines, while a more rustic style could incorporate curves and intricate joinery.
Gathering Your Materials and Tools
Once you finalize your design, gather the necessary materials and tools. This includes your chosen lumber (ensure it's properly treated for outdoor use!), fasteners like screws and bolts (stainless steel is recommended for longevity), wood glue, exterior-grade paint or sealant, sandpaper (various grits), and measuring tape. For tools, you'll need saws (circular saw, handsaw, possibly a jigsaw for curves), a drill with various drill bits, clamps, a level, safety glasses, and work gloves. Consider investing in a quality woodworking clamp set â€" it will significantly improve the accuracy and ease of assembly.
Choosing the Right Fasteners
The longevity of your chaise lounge heavily depends on the quality of your fasteners. Opt for stainless steel screws and bolts; these resist rust and corrosion, ensuring your furniture remains strong for years to come. Use exterior-grade wood glue to reinforce joints and add extra strength to the structure. Pre-drilling pilot holes before screwing into the wood will prevent splitting and ensure a clean finish.
Constructing the Frame
Begin by cutting the lumber to the precise dimensions outlined in your plan. Carefully assemble the frame, using wood glue and screws to join the pieces. Ensure all joints are square and tightly fitted. Clamp each joint securely while the glue dries to ensure a strong bond. Use a level frequently to check for any deviations from square. Consider using mortise and tenon joints for extra strength, but this requires more advanced woodworking skills.
Adding Comfort and Style
Once the frame is complete, it's time to add the elements that transform it into a relaxing chaise lounge. You might choose to add comfortable cushions using outdoor-rated fabric, or build in a slatted seat and back for breathability. Remember to account for proper spacing between slats to allow for comfort and drainage of rainwater. Sand the entire structure thoroughly once the frame is complete, paying attention to any rough edges. Finally, apply a high-quality exterior-grade paint or sealant to protect the wood from the elements and enhance its appearance.
Finishing Touches and Maintenance
Once the paint or sealant is thoroughly dry, you can add any final decorative touches. Consider adding non-slip feet to the bottom to prevent scratching your patio. Regular maintenance will significantly extend the life of your chaise lounge. Periodically clean it with soap and water, and reapply sealant as needed to prevent weathering. Storing it under cover during harsh weather conditions will help keep it looking its best.
With a little patience and careful attention to detail, you'll have a stunning and durable chaise lounge perfect for enjoying your outdoor space for years to come. Relax and enjoy the fruits of your labor!
Woodworking plans for making a cabinet with sliding doors

Craft a Stunning Cabinet with Sliding Doors: A Comprehensive Guide
Tired of bulky doors cluttering your space? Embrace the sleek elegance and space-saving practicality of a sliding door cabinet! This detailed guide walks you through each step, empowering you to build your own custom masterpiece. We'll cover everything from selecting the right materials to fine-tuning the sliding mechanism, ensuring a rewarding woodworking experience and a beautiful, functional addition to your home.
Planning Your Sliding Door Cabinet
Before you reach for your tools, meticulous planning is crucial. Begin by visualizing your ideal cabinet. Consider its intended purpose â€" will it store linens, electronics, or something else entirely? This dictates its dimensions, internal configuration (shelves, drawers), and desired aesthetic. Sketch your design, noting precise measurements for the cabinet’s height, width, and depth. Decide on the material â€" solid wood like oak or maple offers durability and a classic look, while plywood provides a more affordable, lighter alternative. Don't forget to account for the thickness of the wood when calculating the final dimensions.
Choosing Your Sliding Door System
The sliding door mechanism is the heart of your project. Several options exist, each with its own advantages and drawbacks. Consider a simple, readily-available track system from a hardware store for ease of installation. For a more robust and potentially quieter operation, investigate higher-end systems featuring ball-bearing rollers. Carefully measure the door’s weight to ensure your chosen system can comfortably support it. The track should be securely mounted to the cabinet's top, and the rollers need to align perfectly for smooth sliding action.
Cutting and Assembling the Cabinet Carcass
With your plans finalized, start cutting the wood according to your dimensions. Use a high-quality saw, whether it's a table saw, miter saw, or circular saw, ensuring clean, precise cuts. Accuracy here is paramount for a well-fitting cabinet. Assemble the cabinet sides, top, bottom, and back panels using wood glue and screws. Clamps are invaluable to keep everything square and aligned while the glue dries. Remember to predrill pilot holes before screwing to prevent wood splitting.
Building the Interior Structure
Once the cabinet carcass is assembled and the glue has fully cured, construct the interior shelving or drawer units. Cut the shelves to your desired size and position them according to your design. Use shelf supports to ensure stability. If incorporating drawers, build these using dovetail joints or simpler methods like dadoes and rabbets for strength and clean aesthetics. Ensure proper alignment and measure everything twice before cutting. Remember to sand all edges before assembly for a smooth finish.
Constructing the Sliding Doors
Create the sliding doors using the same material as the cabinet. Cut the panels to the correct size, allowing for the added thickness of the door frames. Assemble the frames, paying close attention to squareness, and attach the panels using strong glue and clamps. Sand the doors thoroughly to achieve a smooth surface, ready for finishing. Remember to pre-drill pilot holes before installing the door hardware.
Installing the Sliding Door Mechanism
Attach the chosen sliding door mechanism to the cabinet top and the doors themselves, following the manufacturer’s instructions carefully. This often involves mounting the track, installing the rollers, and potentially adjusting the door alignment for smooth operation. Take your time with this stepâ€"a smoothly operating sliding mechanism is key to the cabinet’s success. Test the doors frequently to ensure they slide easily and smoothly.
Finishing Touches
Once the cabinet is assembled and the sliding doors operate flawlessly, apply a finish. Sand the entire cabinet to a smooth finish, removing any blemishes or imperfections. Apply a stain or paint, following the manufacturer’s instructions, for a long-lasting, beautiful finish. Allow ample drying time between coats. Once dry, add any final hardware, such as knobs or pulls (if desired), and admire your handiwork!
Congratulations! You've successfully built a stunning, functional cabinet with sliding doors. Enjoy the satisfaction of creating something beautiful and useful with your own two hands.
Free country woodworking designs for charming home decor

Free Country Woodworking Designs for Charming Home Décor
The allure of handcrafted home décor is undeniable. The warmth, character, and unique charm imbued in pieces crafted from natural materials, particularly wood, contribute significantly to a home's ambiance. This article explores a diverse range of free country woodworking designs perfect for enhancing your living spaces with rustic elegance and a touch of handcrafted charm. From functional pieces to purely decorative elements, these projects offer varying skill levels, ensuring both novice and experienced woodworkers can find inspiration and satisfaction.
Rustic Farmhouse Accents: Simple Yet Striking Designs
The enduring popularity of the farmhouse aesthetic provides a rich source of inspiration for country woodworking projects. These designs often prioritize simplicity and functionality, utilizing natural wood finishes and clean lines to create a comforting and inviting atmosphere.
A Charming Wooden Wall Shelf
A simple, yet highly functional, wall shelf is a perfect entry-level project for beginners. Utilizing readily available lumber such as pine or fir, this project focuses on precise cuts and clean joinery. Designs can vary from a single, wide shelf to multiple tiered shelves, depending on available space and desired storage capacity. A distressed white or natural wood finish adds to its rustic charm, blending seamlessly with various farmhouse décors. Numerous free plans are available online, often detailing the necessary measurements, cutting lists, and step-by-step instructions with accompanying diagrams.
Rustic Coat Hooks with a Country Twist
Beyond simple functionality, coat hooks offer an opportunity to showcase creativity and craftsmanship. Simple, sturdy hooks crafted from reclaimed wood offer a unique character. Consider using thicker branches, carefully sanded and finished, to create a truly rustic feel. Alternatively, carefully shaped and sanded pieces of wood can be affixed to a backing board, creating a more organized and visually appealing arrangement. Adding a simple, natural stain or leaving the wood in its natural state will enhance the rustic charm.
A Functional Wooden Tray for Serving or Organization
Wooden trays are incredibly versatile, serving as both practical serving pieces and decorative organizational tools. A simple rectangular or square tray, constructed with rabbet joints for added strength and stability, is a straightforward project. The sides can be slightly raised for added functionality. Using different types of wood for the base and sides introduces interesting visual textures. Consider finishing it with a clear coat to highlight the natural wood grain, or opt for a lightly distressed white paint for a more aged aesthetic.
Decorative Elements: Adding Character and Personality
Beyond functional pieces, decorative elements add significant personality and visual interest to your country-style home. These designs offer opportunities for creativity and showcasing individual craftsmanship.
Intricate Wooden Wall Art
From simple geometric patterns to more complex floral designs, wooden wall art offers a vast array of creative possibilities. Using thin wood veneers or carefully cut pieces of wood, intricate designs can be created and adhered to a backing board. Adding a touch of paint or leaving the wood in its natural state will further enhance the overall look. This project allows for personalized customization and artistic expression.
A Charming Wooden Birdhouse
A classic country design, a wooden birdhouse blends functionality with decorative appeal. While seemingly simple, the process allows for considerable creativity in design and size. Consider using different types of wood for contrasting textures and colours. Adding small decorative elements, such as a tiny shingle roof or intricate carvings, can elevate the design. A weather-resistant finish is crucial to ensure longevity.
Personalized Wooden Signs
Personalized wooden signs add a unique touch to any room, serving as charming reminders of cherished memories or simply adding character to a space. These can range from simple, hand-painted signs to intricately carved pieces. Choosing the right font and wording is key, and a clear, weather-resistant finish is essential for outdoor use. Reclaimed wood adds a sense of history and rustic charm to these personalized pieces.
Advanced Projects: For Experienced Woodworkers
For experienced woodworkers, more complex designs offer the opportunity to showcase refined skills and create truly unique and stunning pieces.
A Country-Style Wooden Coffee Table
A substantial project, a country-style coffee table presents a challenge for experienced woodworkers. Careful planning and precise joinery are essential for a sturdy and aesthetically pleasing piece. This project allows for creativity in design, incorporating various joinery techniques, unique wood combinations, and customized features such as drawers or shelves. A durable finish is necessary to withstand regular use.
A Rustic Wooden Bench
Similar to the coffee table, a rustic wooden bench offers a significant challenge. The design can vary from a simple, slatted bench to more intricate designs with curved legs and detailed carvings. Selecting appropriately sized and durable lumber is crucial. Precise cuts, strong joinery, and a robust finish are essential for creating a sturdy and long-lasting piece.
A Free-Standing Wooden Bookshelf
A free-standing bookshelf allows for creative exploration of design, incorporating various joinery techniques and storage solutions. The design can be simple and minimalist or more complex, including intricate carvings and shelving configurations. This ambitious project requires careful planning, precise execution, and a robust finish to ensure stability and longevity. The finished piece will be a statement piece, showcasing the woodworker's skill and attention to detail.
In conclusion, the world of free country woodworking designs offers a vast array of possibilities for enhancing your home's décor with rustic charm and handcrafted elegance. Whether you're a beginner or an experienced woodworker, these projects offer something for everyone. By carefully selecting a design that matches your skill level and creative vision, you can create truly unique and cherished pieces that will add warmth and character to your living spaces for years to come. Remember to always prioritize safety and utilize proper woodworking techniques throughout your projects.
How to build a sturdy floating shelf for any room

Build a Sturdy Floating Shelf: A Comprehensive Guide
Floating shelves offer a sleek, modern way to display your prized possessions and add functional storage to any room. But flimsy shelves are a recipe for disaster. This guide empowers you to build a truly sturdy floating shelf that will hold your books, plants, and cherished knick-knacks securely for years to come. We'll walk you through each step, from planning to installation, ensuring you create a beautiful and reliable addition to your home.
Planning Your Floating Shelf
Before you even pick up a saw, meticulous planning is key. First, decide on the dimensions. Consider the weight you want the shelf to support. A heavier load necessitates thicker, more robust materials. Next, choose your materials. Solid hardwood, like oak or maple, offers superior strength and a beautiful finish. However, less expensive options like plywood or MDF (Medium-Density Fiberboard) work well for lighter loads. Remember to account for the shelf's depth; a deeper shelf requires more robust support. Finally, select your mounting location carefully. Consider the wall's composition (drywall, concrete, etc.) as this impacts the type of fasteners you'll use.
Essential Tools and Materials
Gather these supplies before you begin:
- Wood of your chosen type and dimensions
- Measuring tape
- Pencil
- Saw (circular saw or hand saw)
- Sandpaper (various grits)
- Wood stain or paint (optional)
- Appropriate wall anchors and screws (determined by wall type)
- Stud finder (highly recommended)
- Drill with appropriate drill bits
- Level
- Safety glasses
Construction: Building the Shelf
Now for the construction phase! Begin by cutting your wood to the desired length and depth using your saw. Ensure accurate measurements to avoid wasting materials. Next, sand the edges thoroughly, starting with coarser sandpaper and progressively moving to finer grits. This creates a smooth surface and prevents splintering. If you choose to stain or paint the wood, apply these finishes now according to the manufacturer's instructions, allowing for ample drying time. Remember, proper sanding is essential for a professional look and a safe, splinter-free shelf.
Securing the Shelf Brackets
This is a crucial step. Locate your studs using a stud finder. If you're mounting into drywall without studs, select appropriate heavy-duty wall anchors rated for the weight of your shelf and intended contents. Mark the positions of the brackets on the wall using your pencil and level. Pre-drill pilot holes for the screws to prevent wood splitting. Carefully attach the brackets to the wall using the appropriate screws and anchors. Make sure the brackets are perfectly level; a slight misalignment will result in a crooked shelf.
Installation and Finishing Touches
With the brackets securely in place, it's time to install the shelf. Carefully slide the shelf onto the brackets, ensuring it sits flush against the wall and is perfectly level. You may need a second person to assist with this step, especially if the shelf is large or heavy. Finally, step back and admire your handiwork! You've successfully built a sturdy floating shelf that is both functional and visually appealing. Consider adding decorative touches such as moldings or decorative edging to enhance the aesthetic appeal of your new shelf.
Remember, safety is paramount. Always wear safety glasses when using power tools and handle sharp tools with care. Following these steps will allow you to construct a safe and robust floating shelf that will enhance your home for years to come. Enjoy!
Tuesday, November 26, 2024
How to Make Personalized Toolbox Organizers for Sale

How to Make Personalized Toolbox Organizers for Sale: A Step-by-Step Guide
Hey there, crafty folks! You know how much I love making things, and lately, I've been obsessed with creating personalized toolbox organizers. They're practical, useful, and make awesome gifts! If you're looking for a new side hustle or just want to create something cool for yourself, read on. I'm going to walk you through everything you need to know, from choosing the right materials to finding your ideal customers.
Getting Started: Planning Your Toolbox Organizers
Before you dive headfirst into the world of tool organization, it's crucial to plan. Think about what you want to offer, who your target audience is, and how you'll stand out from the crowd.
What Kind of Organizers Will You Make?
There are tons of possibilities here! You can create organizers for:
- General toolboxes: These are perfect for home DIYers, mechanics, and anyone who needs a little extra organization.
- Specialized toolboxes: Think about specific trades or hobbies, like electrician toolboxes, plumbing toolboxes, or even sewing toolboxes.
- Tool rolls: Great for small tools and accessories, these can be made with a variety of materials.
- Tool pouches: These are smaller and ideal for carrying specific tools like screwdrivers or wrenches.
Don't be afraid to get creative! You can also create organizers for things like:
- First-aid kits
- Car repair kits
- Camping gear
Who Is Your Target Audience?
This will help you decide on the design and pricing of your organizers. Will you cater to professional tradespeople, hobbyists, or beginners? Understanding your audience will guide your choices.
How Will You Stand Out?
In a crowded market, you need a unique selling point. What sets your organizers apart? Consider:
- High-quality materials: Leather, canvas, or durable fabrics make a difference.
- Unique designs: Think custom stitching, embroidery, or bold color combinations.
- Personalized options: Offer engraving, monogramming, or custom designs to create a truly unique product.
- Excellent customer service: Go the extra mile with fast shipping and friendly communication.
Materials and Tools: Your Toolbox for Success
You'll need the right tools and materials to make your personalized organizers. Here's a list to get you started:
Fabric Choices:
For the outer fabric of your organizers, you can choose from a variety of options:
- Canvas: Durable and affordable, perfect for everyday use.
- Leather: Adds a touch of class and longevity, but can be more expensive.
- Denim: Adds a cool, rustic vibe.
- Cordura: Water-resistant and tear-resistant, ideal for outdoor tools.
- Waxed canvas: Provides a rugged, weather-resistant look.
Inside Fabric Choices:
For the interior lining, consider:
- Cotton fabric: Soft and easy to work with.
- Polyester: Durable and water-resistant, perfect for tool pockets.
- Nylon: Lightweight and strong, good for adding extra reinforcement.
Other Materials You'll Need:
- Interfacing: Adds structure and durability to your fabric.
- Sewing thread: Choose thread that matches your fabric color and strength.
- Zippers: Pick sturdy zippers that can handle heavy use.
- Buckles and clasps: For securing your organizers.
- Webbing: For handles or straps.
- Sewing machine: A reliable sewing machine is essential.
- Scissors: Fabric shears are best for cutting fabric.
- Rotary cutter: Optional but very helpful for precise cutting.
- Measuring tape: Always double-check your measurements!
- Iron: For pressing seams and removing wrinkles.
- Marking pen: For marking cutting lines and sewing guides.
Designing and Making Your Personalized Toolbox Organizers
Now that you've got your materials, it's time to get creative!
Step 1: Design Your Organizers
Start by sketching out your ideas. Consider the size, shape, compartments, and overall design of your organizers. Here are some tips for designing great toolbox organizers:
- Think about your target audience: What kind of tools will they use? What are their specific needs?
- Prioritize functionality: The organizers should make it easy to find and access tools.
- Add customization options: This will make your organizers more appealing to buyers.
- Create a clear visual: Draw a detailed sketch or use design software to help visualize your ideas.
Step 2: Create a Pattern
Once you've finalized your design, create a pattern. This will be your guide for cutting and sewing the organizer.
- Use cardboard or paper: Create templates for each piece of the organizer.
- Label your pattern pieces: This will make it easier to keep track of everything.
- Add seam allowances: Remember to add extra fabric for seams.
Step 3: Cut Your Fabric
Using your pattern, cut your fabric pieces carefully. Pay attention to the grain direction of the fabric to ensure consistent sewing and durability.
Step 4: Assemble Your Organizer
Time to sew!
- Follow your pattern carefully: Sew the pieces together, adding interfacing where needed.
- Press your seams: This will give your organizer a professional look.
- Attach zippers, buckles, and other hardware: Follow the instructions for your chosen hardware.
- Reinforce stress points: Add extra stitching where the organizer will experience heavy wear and tear.
Step 5: Finish Your Organizer
Add the final touches to make your organizer truly special:
- Embroidery: Add a monogram or design to personalize your organizer.
- Branding: Create a logo or tag to identify your products.
- Finishing touches: Clean up loose threads, add labels, and give your organizer a final inspection.
Marketing and Selling Your Personalized Toolbox Organizers
Now that you've got your beautiful organizers ready to go, it's time to share them with the world!
Build Your Brand
Give your business a catchy name and create a logo that reflects your style. Consider using social media to showcase your products and connect with potential customers. Start a website or online store to sell your organizers directly.
Promote Your Products
Get the word out there!
- Social media: Share photos and videos of your products in action.
- Online marketplaces: List your organizers on platforms like Etsy or Amazon Handmade.
- Craft fairs and markets: Sell your organizers in person and interact with customers.
- Collaborate with other businesses: Partner with local hardware stores or DIY workshops to reach a wider audience.
Pricing Your Organizers
Pricing is a tricky business, but it's crucial for success. Consider these factors:
- Cost of materials: Factor in the price of fabric, hardware, and shipping.
- Your time and effort: Don't undervalue your skills and the hours you put in.
- Competition: Research prices of similar products to find a sweet spot.
- Value proposition: Highlight what makes your organizers special and justify your pricing.
Commonly Asked Questions
Where can I find good quality fabrics for toolbox organizers?
You can find great fabrics at local fabric stores, online retailers like Amazon, and specialty fabric suppliers that cater to crafting and DIY projects. Look for durable fabrics like canvas, leather, Cordura, or waxed canvas.
How do I personalize toolbox organizers?
There are tons of ways to personalize your organizers! You can use embroidery, monogramming, leather stamping, custom patches, or even fabric painting. Think about what your target audience would enjoy.
How can I get started selling my toolbox organizers online?
Start by creating a website or online store. Platforms like Shopify, Etsy, or Amazon Handmade are great options. Take high-quality photos of your products, write engaging product descriptions, and consider offering free shipping or discounts to attract customers.
What are some tips for making my toolbox organizers stand out?
Focus on quality materials, unique designs, and personalized options. Consider offering a variety of sizes and styles, catering to different needs. Don't be afraid to get creative and let your personality shine through in your work.
I hope this guide has inspired you to start making your own personalized toolbox organizers! Remember, the most important thing is to have fun, be creative, and create something that you're proud of.
The Best Wood Types for Building Wine Racks

The Best Wood Types for Building Wine Racks
The construction of a wine rack is a blend of artistry and practicality. The chosen wood significantly impacts both the aesthetic appeal and the longevity of the rack, influencing factors such as its durability, resistance to environmental factors, and overall cost. Selecting the appropriate wood type requires careful consideration of several key characteristics, ensuring a harmonious marriage of form and function. This comprehensive guide explores some of the best wood types for constructing wine racks, outlining their strengths and weaknesses to aid in making an informed decision.
Hardwoods: A Foundation of Strength and Elegance
Hardwoods, derived from deciduous trees, generally offer superior strength, durability, and aesthetic qualities compared to softwoods. Their dense cellular structure contributes to their resistance to warping, cracking, and insect infestation, making them ideal for long-term wine storage. However, hardwoods typically command a higher price point than their softwood counterparts.
Oak: The Classic Choice
Oak, particularly white oak and red oak, remains a perennial favorite for wine rack construction. Its strength, durability, and beautiful grain patterns lend themselves well to both rustic and modern designs. White oak, known for its exceptional water resistance, is particularly suitable for cellars or humid environments. Red oak, while slightly less water-resistant, offers a richer, more pronounced grain and a warm reddish hue.
Advantages of Oak:
- Exceptional strength and durability.
- Beautiful grain patterns and variations in color.
- Relatively easy to work with (depending on the specific cut).
- Good resistance to moisture (especially white oak).
Disadvantages of Oak:
- Can be expensive, especially high-quality pieces.
- Susceptible to staining if not properly sealed.
Maple: A Versatile and Elegant Option
Maple, particularly hard maple, offers a striking combination of strength, density, and a clean, elegant aesthetic. Its fine, even grain and light color make it a versatile choice for various design styles, from minimalist to traditional. Its hardness also contributes to its resistance to dents and scratches, a crucial factor for a frequently used wine rack.
Advantages of Maple:
- Very hard and durable.
- Fine, uniform grain with a smooth finish.
- Light color allows for easy staining or painting.
- Relatively stable and less prone to warping.
Disadvantages of Maple:
- Can be more expensive than some softwoods.
- Can be more challenging to work with than some softer hardwoods.
Cherry: Rich Tones and Lasting Beauty
Cherry wood presents a luxurious option, prized for its rich, reddish-brown hue that deepens with age. Its relatively hard nature ensures durability, while its fine grain allows for intricate detailing and smooth finishes. Cherry is less resistant to moisture than oak, so proper sealing is crucial, particularly in humid environments.
Advantages of Cherry:
- Beautiful, rich color that deepens over time.
- Fine grain that accepts stains and finishes well.
- Relatively strong and durable.
Disadvantages of Cherry:
- More expensive than many other hardwoods.
- Susceptible to scratches and dents if not protected.
- Requires proper sealing to protect against moisture.
Softwoods: Budget-Friendly Alternatives
Softwoods, sourced from coniferous trees, generally offer a more budget-friendly alternative to hardwoods. While not possessing the same strength and durability, certain softwoods, with proper treatment and construction, can provide satisfactory results for wine rack projects. However, they are more prone to warping, scratching, and insect damage, requiring careful consideration of their limitations.
Pine: A Readily Available and Affordable Choice
Pine is one of the most readily available and affordable softwoods. Its straight grain and relatively soft nature make it easy to work with, ideal for DIY projects. However, pine is susceptible to dents and scratches, and its softness may not be suitable for heavily laden racks. Proper sealing and careful construction are essential to mitigate these weaknesses.
Advantages of Pine:
- Very affordable and readily available.
- Easy to work with, suitable for DIY projects.
- Accepts stains and finishes well.
Disadvantages of Pine:
- Soft and prone to dents and scratches.
- Less durable than hardwoods.
- Susceptible to warping and insect damage if not properly treated.
Beyond the Wood: Essential Considerations
Regardless of the chosen wood, several factors contribute to a successful wine rack project. Proper sealing is crucial to protect the wood from moisture, wine spills, and potential insect infestation. Choosing the right finish, whether a clear coat or a stain, enhances the wood's natural beauty and durability. Finally, careful consideration of the rack's design and construction method ensures its stability and longevity, preventing potential structural failures under the weight of the wine bottles.
Ultimately, the best wood type for your wine rack depends on your budget, aesthetic preferences, and the specific requirements of your storage environment. By carefully weighing the advantages and disadvantages of each wood type, you can make an informed choice that ensures a beautiful and functional wine rack for years to come.
How to Use Free Woodworking Plans to Build Simple and Functional Projects

Unlocking Your Inner Craftsman: A Guide to Utilizing Free Woodworking Plans for Simple and Functional Projects
Woodworking offers a unique blend of creativity, skill, and satisfaction. It allows you to transform raw materials into functional and beautiful pieces, adding a personal touch to your home or gifting something truly special. While the prospect of woodworking might seem daunting, especially for beginners, the availability of free woodworking plans simplifies the process, making it accessible to all. This comprehensive guide will equip you with the knowledge and confidence to embark on your woodworking journey, using readily available free plans to build simple and functional projects.
Why Choose Free Woodworking Plans?
Free woodworking plans offer a multitude of advantages, making them an ideal starting point for beginners and experienced woodworkers alike:
- Cost-Effective: Eliminating the cost of purchasing plans allows you to allocate your budget towards quality materials and tools.
- Variety: The online world offers a vast repository of free plans covering diverse project types, from simple shelves and birdhouses to more intricate furniture pieces.
- Learning Opportunity: Studying free plans exposes you to different woodworking techniques, materials, and construction methods, enhancing your skillset.
- Accessible Resource: Free plans are readily available through numerous online platforms, websites, and communities, making them conveniently accessible.
Finding the Perfect Plan: Your Woodworking Adventure Begins
The first step in your woodworking journey is finding the ideal plan that aligns with your skills, interests, and desired outcome. Here's how to navigate the world of free woodworking plans:
Identify Your Project Goals
Before embarking on your search, clarify your objectives. Ask yourself:
- What kind of project do you want to build? (e.g., storage shelf, coffee table, birdhouse)
- What level of difficulty are you comfortable with? (beginner, intermediate, advanced)
- What materials and tools do you have available?
- What is your budget for the project?
Explore Online Resources
Numerous online platforms offer a treasure trove of free woodworking plans. Some popular resources include:
- Ana White: Renowned for detailed plans and easy-to-follow instructions.
- The Woodworking for Mere Mortals Website: Offers plans for various projects with clear explanations and helpful tips.
- Instructables: Features a vast collection of DIY projects, including woodworking plans submitted by users.
- Pinterest: A visual platform where you can find inspiration and links to free woodworking plans.
- YouTube: Explore woodworking channels offering tutorials and free plan downloads.
Consider Your Needs and Preferences
When browsing plans, pay attention to the following aspects:
- Detailed Instructions: Ensure the plans provide comprehensive steps, diagrams, and measurements.
- Material List: A detailed list of required materials helps you plan your shopping trip.
- Skill Level: Select plans that match your current woodworking expertise to avoid frustration.
- Style and Design: Choose plans that resonate with your aesthetic preferences and suit the intended space.
Mastering the Plan: From Blueprint to Reality
Once you've selected a plan, it's time to dive into the details and bring your project to life. Here's a step-by-step guide:
Read and Understand the Plans
Before starting any work, carefully read and understand the entire plan. Familiarize yourself with the steps, diagrams, and terminology. If any parts are unclear, seek clarification online or from experienced woodworkers.
Gather Materials and Tools
Based on the material list provided in the plan, gather all necessary materials. Ensure you have the correct type and quantity of wood, fasteners, glue, and finishing products. Gather the required tools, such as a saw, drill, sander, clamps, and measuring tools.
Prepare Your Work Area
Set up a dedicated work area, ensuring it is clean, well-lit, and provides ample workspace. Clear any obstacles and organize your tools and materials to facilitate a smooth workflow.
Follow the Instructions Carefully
Carefully follow the steps outlined in the plan, paying close attention to measurements, angles, and assembly techniques. Don't rush the process; take your time and ensure each step is done accurately.
Test Fit and Adjust
Before permanently assembling any components, perform test fits to ensure everything lines up correctly. If adjustments are needed, make them before final assembly.
Sand and Finish
Once the project is assembled, smooth any rough edges with sandpaper. Apply the desired finish, such as paint, stain, or sealant, to enhance the aesthetics and protect the wood.
Beyond Simple Projects: Expanding Your Woodworking Horizons
Free woodworking plans are an excellent starting point for your woodworking journey. As you gain experience and confidence, you can explore more complex projects and delve deeper into woodworking techniques. Consider these options:
- Advanced Projects: Search for free plans for furniture, cabinets, or outdoor structures that involve intricate joinery and more challenging techniques.
- Online Woodworking Communities: Engage with online forums and communities dedicated to woodworking, where you can share your projects, seek advice, and learn from experienced woodworkers.
- Woodworking Courses and Workshops: Enroll in woodworking courses or workshops to gain hands-on experience and learn specialized techniques.
Safety First: Woodworking Responsibly
Woodworking involves using power tools and sharp objects, so safety is paramount. Always prioritize safety by:
- Wearing appropriate safety gear: Eye protection, hearing protection, gloves, and dust masks are essential.
- Using power tools correctly: Familiarize yourself with the operating instructions and safety features of each tool.
- Working in a well-ventilated area: Woodworking dust can be harmful to your health. Ensure adequate ventilation.
- Keeping your work area clean and organized: A cluttered workspace can lead to accidents.
Conclusion: Embrace the Joy of Woodworking
Free woodworking plans empower you to build functional and beautiful projects, transforming your creative vision into reality. By following this comprehensive guide, you can confidently embark on your woodworking journey, learning valuable skills and discovering the joy of crafting with wood. Remember to embrace the learning process, experiment with different designs, and enjoy the satisfaction of creating something with your own hands. The world of woodworking is waiting to be explored, and with free plans as your guide, your woodworking adventures are only just beginning.
How to Build a Shoe Rack That Helps Maximize Closet Space
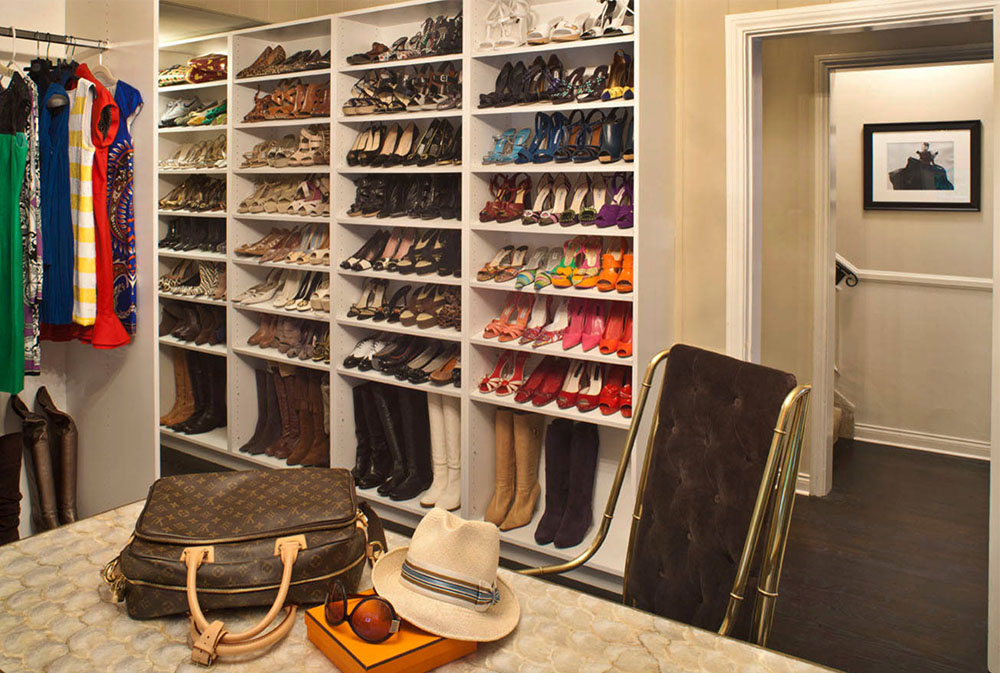
Building a Shoe Rack That Maximizes Closet Space
Let's face it, shoe storage can be a real headache. It's so easy to let your shoe collection pile up, creating a chaotic mess in your closet. But don't despair! Building your own shoe rack is a great way to reclaim that precious closet space and finally get your footwear organized. Plus, it’s a satisfying DIY project that you can tailor to your specific needs and style.
In this article, we'll walk you through the steps of building a shoe rack that will make your closet feel like a luxurious boutique. We'll cover everything from choosing the right materials to assembling your creation, with helpful tips and tricks along the way.
Planning Your Shoe Rack
Before you grab your hammer and nails, it’s important to plan out your shoe rack. Consider the following:
1. Your Space and Shoe Collection
Take a good look at the space you have available in your closet. Measure the width, depth, and height of the area you want to dedicate to the shoe rack. Then, take stock of your shoe collection. How many pairs do you have? Are they mostly flats, heels, or sneakers? Knowing this will help you determine the size and configuration of your shoe rack.
2. Shoe Rack Design
There are endless possibilities when it comes to shoe rack design. You can opt for a simple tiered shelf, a more elaborate tiered rack, or even a vertical rack that maximizes your vertical space. You can even add decorative elements like molding or paint to personalize your shoe rack.
3. Materials
The material you choose will depend on your budget and the style of your closet. Here are some popular options:
- Wood: A classic choice that provides both durability and a timeless look. Choose from softwoods like pine or cedar for a more affordable option, or hardwoods like oak or maple for a more luxurious feel.
- Metal: Great for a modern or industrial style. Metal shelves are usually sturdy and can be easily wiped down.
- Plastic: A budget-friendly option that is lightweight and easy to assemble. However, plastic might not be as durable as wood or metal.
Building Your Shoe Rack
Now for the fun part - let's build that shoe rack! You'll need the following tools and materials:
- Wood or metal shelves (Depending on your chosen design)
- Brackets (To support the shelves)
- Screws (To attach the shelves and brackets)
- Level (To ensure your shelves are straight)
- Tape measure (For accurate measurements)
- Saw (If cutting wood shelves to size)
- Drill (For drilling pilot holes before screwing)
- Screwdriver (For attaching shelves and brackets)
- Sandpaper (To smooth out any rough edges)
- Paint or stain (Optional, for a personalized look)
Step-by-Step Instructions
Here's a general guide to building your shoe rack. You can adjust the steps depending on your chosen design:
- Mark the wall: Measure and mark the desired location of your shoe rack on the wall. You might need a helper for this step, especially if you're working with a larger rack.
- Install the brackets: Use a level to ensure your brackets are perfectly straight. Drill pilot holes before attaching them to the wall with screws.
- Attach the shelves: Place the shelves on the brackets and secure them with screws. Make sure the shelves are flush with the brackets and level before tightening them.
- Sand and finish: If using wood shelves, sand down any rough edges for a smooth finish. You can then paint or stain the shelves according to your preference.
- Organize your shoes: Now comes the most satisfying part - neatly organizing your shoes on the shelves. You can arrange them by type, color, or occasion.
Tips for Maximizing Space
Here are some clever tips for maximizing space in your closet:
- Vertical Storage: Make the most of your vertical space with a tall and narrow shoe rack instead of a wide one.
- Double-Tiered Shelves: Consider using two-tiered shelves instead of single-tiered shelves to store more pairs in the same space.
- Utilize Wall Space: If you have some empty wall space in your closet, install a wall-mounted shoe rack or utilize a hanging shoe organizer that hangs over your closet rod.
- Clear the Floor: Avoid placing your shoes on the floor. A dedicated shoe rack will free up valuable floor space.
- Shoe Boxes: Use clear shoeboxes to store shoes that you don't wear frequently. This way, you can easily see what's inside without having to dig through piles of shoes.
Commonly Asked Questions
Here are some frequently asked questions about building a shoe rack:
1. What is the best way to choose the right size for my shoe rack?
Measure the width and height of your closet space and consider the size of your shoe collection. A general rule of thumb is to allow 12 inches of width per shoe pair for optimal storage.
2. What are some good ideas for decorating my shoe rack?
You can add decorative touches to your shoe rack with paint, wallpaper, or even patterned fabric. You can also use decorative hooks to hang hats or scarves near your shoe rack.
3. How can I make my shoe rack more functional?
Adding features like drawers, shelves, or baskets to your shoe rack can make it more functional. You can use drawers to store shoe accessories or small items, shelves for shoes, and baskets for frequently used items.
4. Is it difficult to build a shoe rack myself?
Building a shoe rack can be a fun and rewarding DIY project. With some basic woodworking skills and tools, you can easily create a custom shoe rack to fit your needs and style.
Remember, building your own shoe rack is a great way to personalize your closet and create a more organized space. So get out your tools, get creative, and enjoy the process of building a custom shoe rack that fits your unique needs and style!
Stylish Wooden Storage Bins That Shoppers Will Love
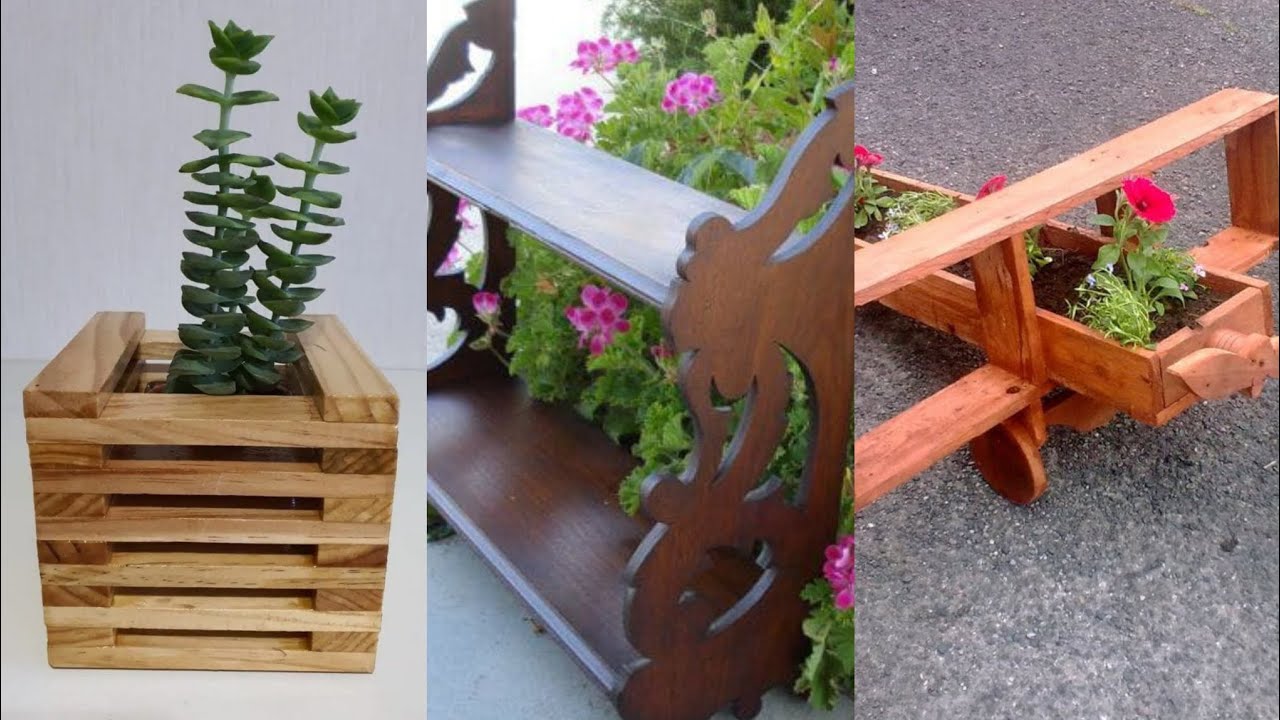
Stylish Wooden Storage Bins That Shoppers Will Love
Tired of clutter and messy spaces? Wooden storage bins are a timeless and practical solution for organizing your home, while adding a touch of natural beauty. They're not just about functionality; they can also be a statement piece that enhances your décor. Whether you're looking to tidy up your bedroom, bathroom, or living room, stylish wooden storage bins are the perfect way to go!
In this guide, we'll dive deep into the world of wooden storage bins, uncovering the key features that shoppers crave. We'll explore different styles, materials, and uses to help you find the perfect bins to suit your needs and aesthetic.
Why Choose Wooden Storage Bins?
There's a reason wooden storage bins have stood the test of time. Here are some of their key advantages:
- Durability: Well-crafted wooden bins are built to last. They can handle heavy items and stand up to daily use without showing signs of wear and tear.
- Versatility: Wooden storage bins come in a range of shapes, sizes, and styles, making them suitable for a variety of organizational tasks, from storing blankets and toys to holding craft supplies or toiletries.
- Aesthetic Appeal: The natural warmth and beauty of wood instantly elevates any space. Wooden bins add a touch of rustic charm, farmhouse style, or minimalist elegance, depending on your preference.
- Sustainability: Choosing wood as a material for storage bins is an eco-conscious choice. Wood is a renewable resource and can be sourced sustainably.
- Easy to Clean: Most wooden storage bins can be easily wiped down with a damp cloth, keeping them clean and hygienic.
Types of Wooden Storage Bins
Let's take a closer look at the various types of wooden storage bins available:
Open Bins
Open bins are perfect for quick access to items. They often feature a slatted or open-weave design, providing ventilation and making it easy to see what's inside. They're great for storing towels, blankets, or items you want to display.
Closed Bins
Closed bins offer a more discreet and dust-proof storage solution. They come with lids that securely seal the contents, keeping things organized and protected. They are ideal for storing clothes, toys, or other items you want to keep out of sight.
Stackable Bins
Stackable bins maximize space efficiency, especially in smaller areas. They feature a design that allows them to stack securely on top of each other, saving valuable floor space. This makes them perfect for storing items in closets, pantries, or under beds.
Bins with Handles
Bins with handles offer easy mobility and transport. The handles are typically made of durable wood, metal, or rope, and are designed to make lifting and moving the bins convenient.
Choosing the Right Wooden Storage Bins
Now that you're familiar with the different types, let's focus on choosing the perfect wooden storage bins for your needs:
Consider Your Storage Needs
What are you planning to store in your bins? Are you organizing clothes, books, toys, or other items? The size, shape, and type of bin will depend on the contents. For example, a large open bin might be perfect for storing blankets, while a smaller closed bin might be ideal for storing toiletries.
Think About the Space
Where will you place your bins? Measure the area to ensure you choose bins that will fit comfortably and leave you with enough space to move around. Consider factors like ceiling height and the size of shelves or drawers if you're planning to store the bins inside them.
Choose a Style that Complements Your Décor
Wooden storage bins come in various styles and finishes, so select those that align with your home's aesthetic. Do you prefer a rustic, modern, minimalist, or farmhouse look? Match the color, finish, and design of your bins to create a cohesive and stylish look.
Tips for Using Wooden Storage Bins
Here are some tips to maximize the usefulness and longevity of your wooden storage bins:
- Label Your Bins: Labeling your bins helps you easily identify their contents and keeps your organization system organized.
- Use Dividers or Organizers: For even more organization within the bins, consider adding dividers, trays, or boxes to separate items.
- Protect the Wood: To prevent moisture damage, use liners or breathable fabrics inside the bins, especially if you are storing items that are prone to moisture or spills.
- Clean Regularly: Wipe down your wooden storage bins with a damp cloth to remove dust and dirt and keep them looking their best.
Where to Find Stylish Wooden Storage Bins
You can find a wide variety of stylish wooden storage bins online and in retail stores. Look for reputable brands and retailers that offer high-quality, well-crafted bins with a focus on durability and style.
Here are some places to start your search:
- Home goods stores: Retailers like Target, Walmart, and IKEA offer a wide selection of wooden storage bins at various price points.
- Department stores: Department stores like Macy's, Nordstrom, and Bloomingdale's also carry a curated selection of high-end and designer storage bins.
- Online retailers: Websites like Amazon, Etsy, and Wayfair offer a vast array of choices, including handcrafted and unique wooden storage bins.
- Specialty stores: Consider visiting specialty stores that focus on home décor and organization for a more personalized shopping experience.
Commonly Asked Questions
Here are some answers to common questions about wooden storage bins:
Are wooden storage bins waterproof?
No, most wooden storage bins are not waterproof. However, you can find some bins that are treated with a water-resistant finish. To protect your bins from moisture damage, it's best to use liners or breathable fabrics inside.
How do I clean wooden storage bins?
You can clean wooden storage bins with a damp cloth. Avoid using harsh chemicals or abrasive cleaners that could damage the finish.
Are wooden storage bins eco-friendly?
Yes, wooden storage bins are eco-friendly as long as they are made from sustainable sources. Look for bins that are certified by organizations like the Forest Stewardship Council (FSC) to ensure that they are made from responsibly harvested wood.
Ready to transform your home with stylish wooden storage bins? Start browsing and find the perfect ones to bring organization and a touch of natural elegance to your space! Remember to consider your needs, style, and budget to make the best choices for your home.