Tuesday, November 26, 2024
How to Build a Shoe Rack That Helps Maximize Closet Space
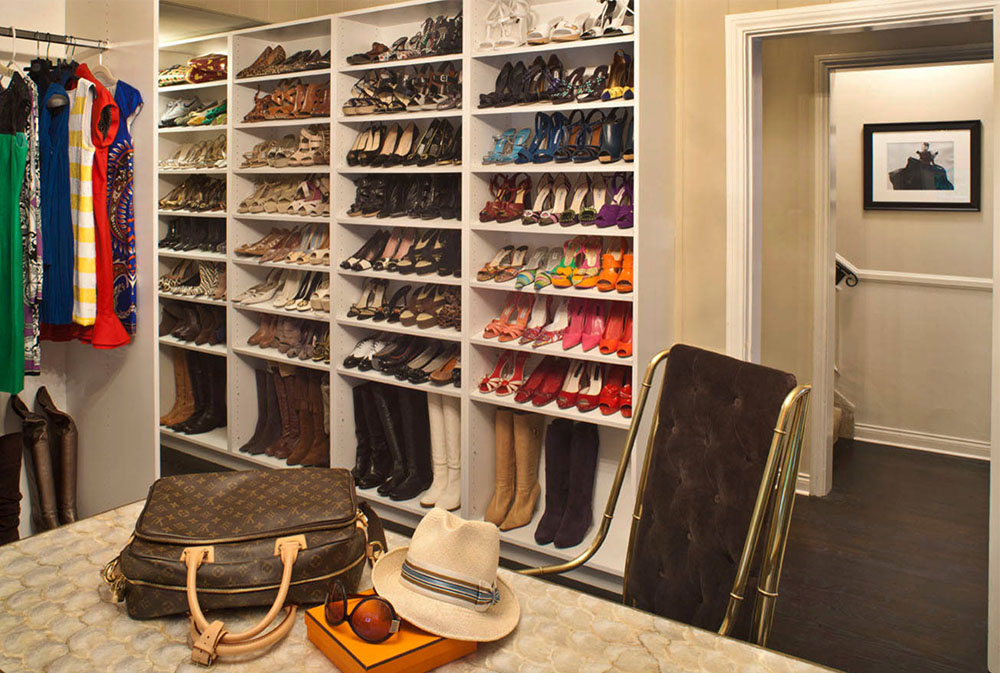
Building a Shoe Rack That Maximizes Closet Space
Let's face it, shoe storage can be a real headache. It's so easy to let your shoe collection pile up, creating a chaotic mess in your closet. But don't despair! Building your own shoe rack is a great way to reclaim that precious closet space and finally get your footwear organized. Plus, it’s a satisfying DIY project that you can tailor to your specific needs and style.
In this article, we'll walk you through the steps of building a shoe rack that will make your closet feel like a luxurious boutique. We'll cover everything from choosing the right materials to assembling your creation, with helpful tips and tricks along the way.
Planning Your Shoe Rack
Before you grab your hammer and nails, it’s important to plan out your shoe rack. Consider the following:
1. Your Space and Shoe Collection
Take a good look at the space you have available in your closet. Measure the width, depth, and height of the area you want to dedicate to the shoe rack. Then, take stock of your shoe collection. How many pairs do you have? Are they mostly flats, heels, or sneakers? Knowing this will help you determine the size and configuration of your shoe rack.
2. Shoe Rack Design
There are endless possibilities when it comes to shoe rack design. You can opt for a simple tiered shelf, a more elaborate tiered rack, or even a vertical rack that maximizes your vertical space. You can even add decorative elements like molding or paint to personalize your shoe rack.
3. Materials
The material you choose will depend on your budget and the style of your closet. Here are some popular options:
- Wood: A classic choice that provides both durability and a timeless look. Choose from softwoods like pine or cedar for a more affordable option, or hardwoods like oak or maple for a more luxurious feel.
- Metal: Great for a modern or industrial style. Metal shelves are usually sturdy and can be easily wiped down.
- Plastic: A budget-friendly option that is lightweight and easy to assemble. However, plastic might not be as durable as wood or metal.
Building Your Shoe Rack
Now for the fun part - let's build that shoe rack! You'll need the following tools and materials:
- Wood or metal shelves (Depending on your chosen design)
- Brackets (To support the shelves)
- Screws (To attach the shelves and brackets)
- Level (To ensure your shelves are straight)
- Tape measure (For accurate measurements)
- Saw (If cutting wood shelves to size)
- Drill (For drilling pilot holes before screwing)
- Screwdriver (For attaching shelves and brackets)
- Sandpaper (To smooth out any rough edges)
- Paint or stain (Optional, for a personalized look)
Step-by-Step Instructions
Here's a general guide to building your shoe rack. You can adjust the steps depending on your chosen design:
- Mark the wall: Measure and mark the desired location of your shoe rack on the wall. You might need a helper for this step, especially if you're working with a larger rack.
- Install the brackets: Use a level to ensure your brackets are perfectly straight. Drill pilot holes before attaching them to the wall with screws.
- Attach the shelves: Place the shelves on the brackets and secure them with screws. Make sure the shelves are flush with the brackets and level before tightening them.
- Sand and finish: If using wood shelves, sand down any rough edges for a smooth finish. You can then paint or stain the shelves according to your preference.
- Organize your shoes: Now comes the most satisfying part - neatly organizing your shoes on the shelves. You can arrange them by type, color, or occasion.
Tips for Maximizing Space
Here are some clever tips for maximizing space in your closet:
- Vertical Storage: Make the most of your vertical space with a tall and narrow shoe rack instead of a wide one.
- Double-Tiered Shelves: Consider using two-tiered shelves instead of single-tiered shelves to store more pairs in the same space.
- Utilize Wall Space: If you have some empty wall space in your closet, install a wall-mounted shoe rack or utilize a hanging shoe organizer that hangs over your closet rod.
- Clear the Floor: Avoid placing your shoes on the floor. A dedicated shoe rack will free up valuable floor space.
- Shoe Boxes: Use clear shoeboxes to store shoes that you don't wear frequently. This way, you can easily see what's inside without having to dig through piles of shoes.
Commonly Asked Questions
Here are some frequently asked questions about building a shoe rack:
1. What is the best way to choose the right size for my shoe rack?
Measure the width and height of your closet space and consider the size of your shoe collection. A general rule of thumb is to allow 12 inches of width per shoe pair for optimal storage.
2. What are some good ideas for decorating my shoe rack?
You can add decorative touches to your shoe rack with paint, wallpaper, or even patterned fabric. You can also use decorative hooks to hang hats or scarves near your shoe rack.
3. How can I make my shoe rack more functional?
Adding features like drawers, shelves, or baskets to your shoe rack can make it more functional. You can use drawers to store shoe accessories or small items, shelves for shoes, and baskets for frequently used items.
4. Is it difficult to build a shoe rack myself?
Building a shoe rack can be a fun and rewarding DIY project. With some basic woodworking skills and tools, you can easily create a custom shoe rack to fit your needs and style.
Remember, building your own shoe rack is a great way to personalize your closet and create a more organized space. So get out your tools, get creative, and enjoy the process of building a custom shoe rack that fits your unique needs and style!
No comments:
Post a Comment
Note: Only a member of this blog may post a comment.